Our Content Management System (CMS)
A Content Management System (CMS) is needed to hold all our articles and data for the website to run – we're using Strapi. This seciton can be thought of as the admin side - or back-end, and will show the steps taken to set up Strapi, connect it to our front-end application, and deploy it.
Strapi
Prototypr uses Strapi for the CMS. Strapi is an Open Source headless CMS that acts as the backend of the Prototypr app.
In a 'headless CMS' setup, the front-end is completely separated from the back end, so there are 2 parts of the Prototypr app, both in different GitHub Repos:
- Prototypr front-end website – a NextJS app that displays our data
- Prototypr backend CMS – A Strapi Content Management System that stores and handles all the data.
Learn more about headless CMS:
A headless CMS is any type of back-end content management system where the content repository “body” is separated or decoupled from the presentation layer “head.” Content that is housed in a headless CMS is delivered via APIs for seamless display across different devices.
Installation
The Strapi installation instructions are here, but below are the steps we took when installing Strapi for Prototypr:
1. Install a compatible Node Version
The important parts are to install the right Node version. We are using 14.17.4. You can install it using nvm, and use it like this: nvm use 14.17.4
2. Use Postgres Database
❗️Before installing Strapi, set up a Postgresql database by following this tutorial.
Next, create the Strapi application using this command (at the time, we are using Strapi v. 4.0.7):
npx create-strapi-app@latest prototypr-backend
Rather than using the recommended settings which includes an sql database, choose a customised setup and use postgres. This choice has been made so it casily be deployed on Digital Ocean App Platform for hosting.
3. Run Strapi
Now you can run Strapi from the project folder you just created (prototypr-backend):
npm run develop. Other commands:
Available commands in your project: npm run develop Start Strapi in watch mode. (Changes in Strapi project files will trigger a server restart) npm run start Start Strapi without watch mode. npm run build Build Strapi admin panel. npm run strapi Display all available commands.You can start by doing: cd /Users/graeme/Documents/workspace/prototypr-backend npm run developFrom here, set up your username and password for local use. Next we need to set up the content types and components for the CMS.
Content Types
At this point, you should be able to log into the Strapi dashboard, but it looks empty, like this:
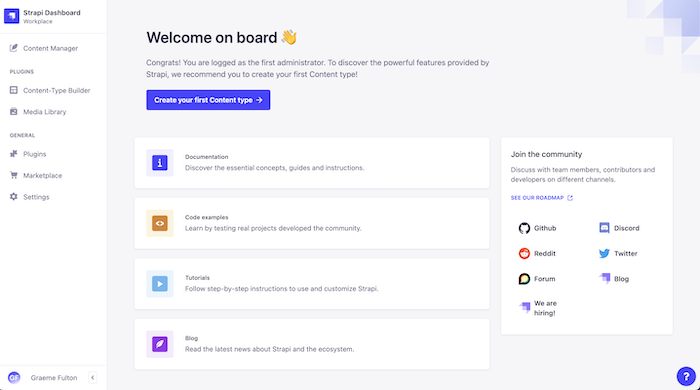
From here, we set up the Prototypr content types.
We already had this done in the previous version of Strapi, but they need recreating to work with Strapi 4.
Components
In Prototypr, we have a few different collection types from our original WordPress site - posts, news, blogs, inspiration, and newsletters. Each of these content types can have similar data, for example, most of them need a 'Gallery' to hold images. That's what components are for:
Components are reusable structures you can share between all your content types. Components can be included in any content type either as a single entry or a list of entries for meta information, links, sections list or any repeatable content.
The components can be seen in our old Strapi version 3 repository, in the components folder: prototypr-backend-old/components/. These include:
- attributes – these are used for news links, including ogImage, ogDescription and other meta.
- featured-image – featured images contain a srcset, thumb, and different sizes.
- gallery – similar to featured image, gallery items have image size attributes
- legacy-media - we have migrated from WordPress, and this component is for the WP media stuff
- seo – we have migrated from WordPress, and this component is for the WP SEO stuff
- post-type (see below)
Collection Types
Strapi: Easily create collection types to repeat the same type of content like blog posts, products, users or any list of content you can think of.
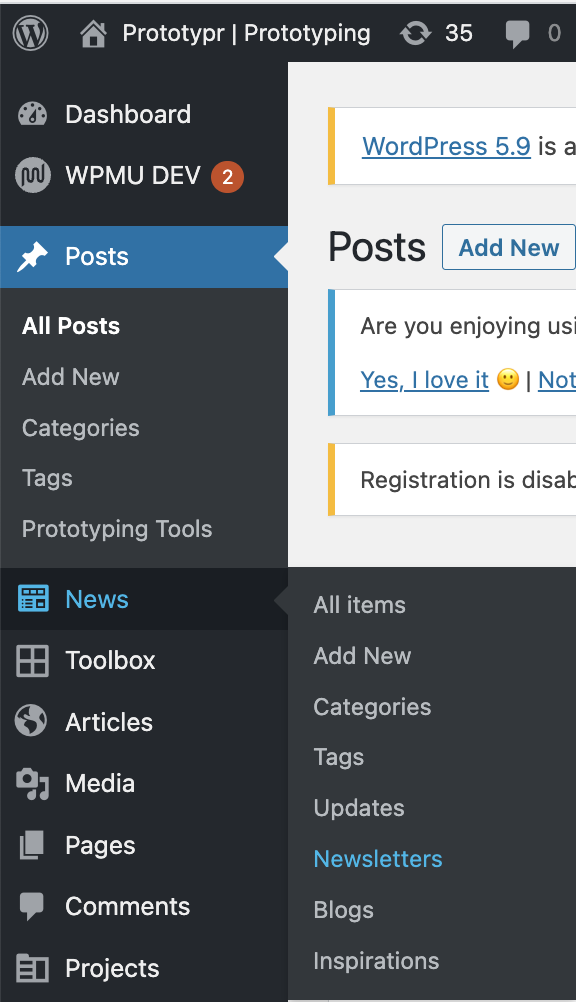
In Wordpress, we had a bunch of 'post types', including: posts, news, blogs, inspiration, and newsletters. But it got overwhelming, looking like this:
Posts Collection
Therefore we will have 1 collection type, called posts, and a post-types content type to filter them. This means everything can share the same tags too.
Post Types
Content Model
As outlined above, instead of having many different collection types for each type of post (article, newsletter, news, inspiration), they can all fit into a common 'Post' collection since they all share similar properties.
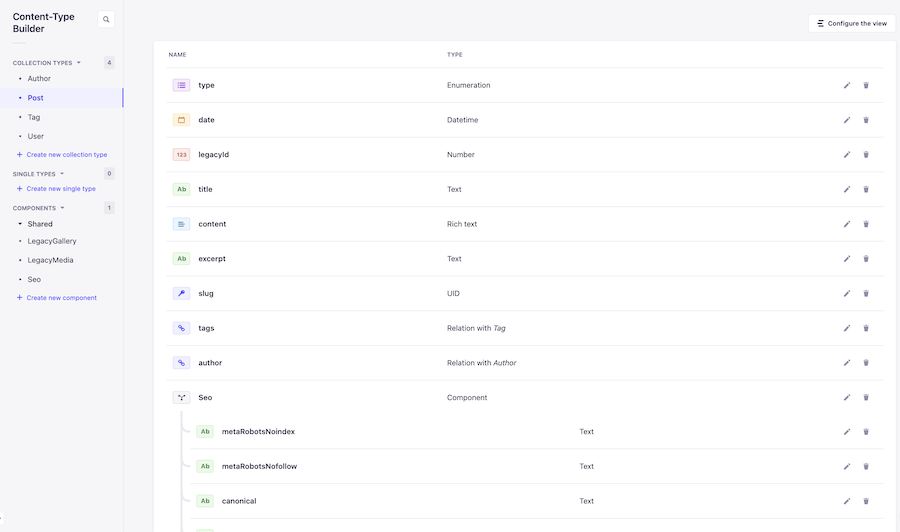
This will keep the Strapi dashboard simpler and easier to navigate. To distinguish between post types, an Enumaration called type is used (read about enums here). The type enumeration is shown in the following screenshot as the top field:
Next, an author and tags collection are added, a bit like this Strapi tutorial on creating a CSS Tricks clone.
WordPress Migration
We have a separater repository, called wordpress-strapi-migration, which has a README.md on how to migrate our content from Wordpress. It reads content from different post types using the WP-GraphQL endpoints, and inserts them into Strapi with a Post request. The outcome looks like this:
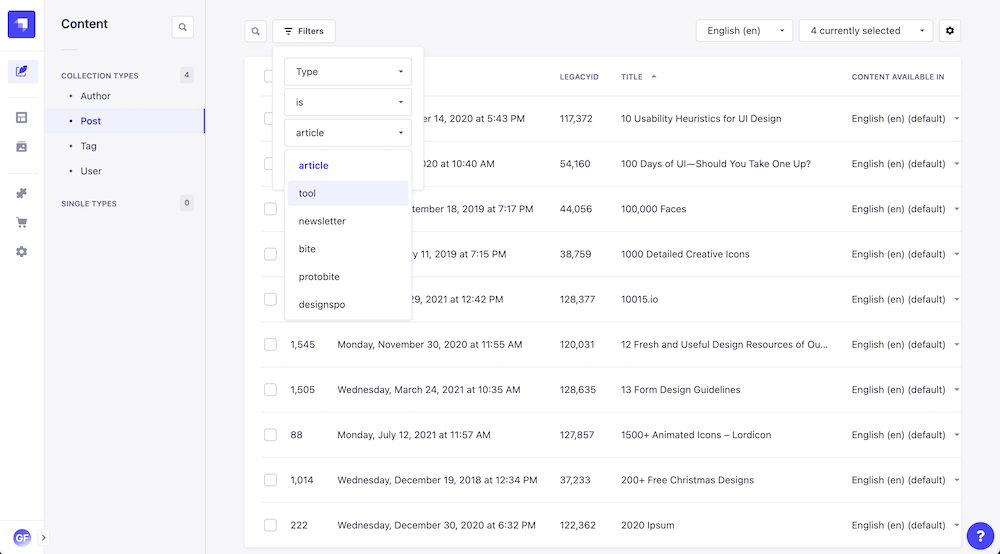
As you can see above, you can filter between article, tool, newsletter etc, and they're all included as regular posts.
Strapi Issues
Database
These are issues that came up a few times when installing Strapi - mostly due to the database connection:
Finding the database name
>graeme@Graemes-MacBook-Air prototypr-frontend % postgres -V
>postgres (PostgreSQL) 14.1
>graeme@Graemes-MacBook-Air prototypr-frontend % psql postgres
psql (14.1)Type "help" for help.postgres=# \l List of databases Name | Owner | Encoding | Collate | Ctype | Access privileges -----------+--------+----------+---------+-------+--------------------- postgres | graeme | UTF8 | C | C | prototypr | graeme | UTF8 | C | C | =Tc/graeme + | | | | | graeme=CTc/graeme + | | | | | graylien=CTc/graeme strapi | graeme | UTF8 | C | C | =Tc/graeme + | | | | | graeme=CTc/graeme + | | | | | graylien=CTc/graemeCannot connect to Database
Sometimes, you can get the error:
Building your admin UI with development configuration ...Admin UI built successfully[2022-02-07 16:36:55.378] debug: ⛔️ Server wasn't able to start properly.[2022-02-07 16:36:55.379] error: connect ECONNREFUSED 127.0.0.1:5432Error: connect ECONNREFUSED 127.0.0.1:5432 at TCPConnectWrap.afterConnect [as oncomplete] (net.js:1148:16)This is because Postgres is not running. To start it, for mac you can try:
pg_ctl -D /usr/local/var/postgres start
And if you're seeing this error now: 2022-02-07 16:03:24.771 GMT [21548] DETAIL: The data directory was initialized by PostgreSQL version 13, which is not compatible with this version 14.1., upgrade postgres:
brew postgresql-upgrade-database
If you get the error, Cannot shutdown old postmaster when upgrading to Postgres 9.2, here is a solution that worked for me.
Strapi Cannot Handle Lots of Posts
There is an issue in Strapi with database relations that crashes the admin dashboard when it contains 1000s of posts. A workaround is to create a new user on the admin dashboard, and remove the permission to edit tags and authors in Posts. This ensures tags and author relations cannot load, so the dashboard doesn't crash. The downside is you can't edit tags/authors.
Deploying Strapi
We're using Digital Ocean App Platform for deploying the Strapi backend. It's possible to use other services though, such as Heroku, AWS, and more – Strapi have deployment guides for all of them here. The outcome of this will be the Prototypr/Strapi backend running at your own URL - it won't include any data, posts or user accounts!
This section will cover some steps and issues when deploying Strapi in development mode on the DO App platform.
Create the project
- First, make sure you have the Prototypr backend cloned to your own repository in GitHub
- Create a new App in DO App Platform, and choose the Prototypr backend from your GitHub Account as the source:
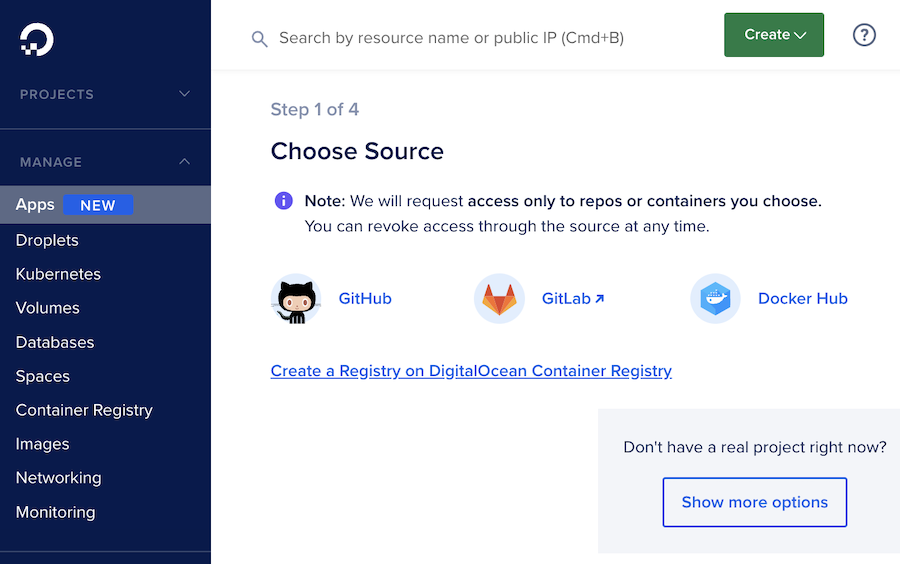
- Set it up on the basic tier ($10 a month), with the following in the Environmental variables section (taken from the
.envfile):
## STRAPI ADMIN## /config/admin.jsADMIN_JWT_SECRET=<jwt key>## DATABASE SETTINGS## /config/database.jsDATABASE_HOST = ${db.HOSTNAME}DATABASE_NAME = ${db.DATABASE}DATABASE_PORT = ${db.PORT}DATABASE_USERNAME = ${db.USERNAME}DATABASE_PASSWORD = ${db.PASSWORD}DATABASE_URL = ${db.DATABASE_URL}NODE_ENV = production## STANDARD STRAPI KEYS APP_KEYS = <put your keys here>JWT_SECRET = <put your jwt here>API_TOKEN_SALT = <put your token here>## Additional for account creationADMIN_TOKEN=<token from the strapi dashboard>STRAPI_URL=http://localhost:1337## MAILGUN PLUGIN KEYS FOR EMAIL NOTIFICATIONSMAILGUN_API_KEY=<mailgun api key>MAILGUN_DOMAIN=<mailgun domain>## DO_SPACE_ACCESS_KEY=<do spaces access key>DO_SPACE_SECRET_KEY=<do spaces secret>DO_SPACE_ENDPOINT=sfo2.digitaloceanspaces.comDO_SPACE_BUCKET=prototypr-mediaDO_SPACE_DIRECTORY=strapiDO_SPACE_CDN=NODE_TLS_REJECT_UNAUTHORIZED = 0Notes on Env variables:
- Wherever you se
db.(e.g.db.HOSTNAME), db is your database name that you chose when creating the database. - The
ADMIN_TOKENcomes from the strapi dashboard itself. When logged in as admin, create a new API token from the dashboard:admin/settings/api-tokens, and paste that in! It's used to for the backend to make requests that only admins are allowed to do. APP_KEYS,JWT_SECRET, andAPI_TOKEN_SALTcan be found in the.envfile at the root of your Strapi project. If you don't have one because you cloned our repo (it's excluded from GitHub for security), it looks like this:
HOST=0.0.0.0PORT=1337APP_KEYS=key1,key2,key3,key4JWT_SECRET=32characternumberhereAPI_TOKEN_SALT=32characternumberhere
These are created automatically with any new Strapi project, but if you are cloning the Prototypr repository, you may have to create your own:
Creating Keys
For each of the toBeModified in the snippet below, paste in a string, generated by running openssl rand -base64 32 in your terminal (as reccommended in this section of the Strapi docs).
APP_KEYS="toBeModified,toBeModified"API_TOKEN_SALT=tobemodifiedADMIN_JWT_SECRET=tobemodifiedJWT_SECRET=tobemodifiedHere's more ways to generate random keys for fun:
More issues
NODE_TLS_REJECT_UNAUTHORIZED- this is added to avoid SSL issues in developement. We were getting the following error:
[2022-02-15 00:24:33] > strapi start[2022-02-15 00:24:33] [2022-02-15 00:24:42] [2022-02-15 00:24:42.373] debug: ⛔️ Server wasn't able to start properly.[2022-02-15 00:24:42] [2022-02-15 00:24:42.377] error: no pg_hba.conf entry for host "139.59.196.138", user "db", database "db", SSL off[2022-02-15 00:24:42] error: no pg_hba.conf entry for host "139.59.196.138", user "db", database "db", SSL off[2022-02-15 00:24:42] at Parser.parseErrorMessage (/workspace/node_modules/pg-protocol/dist/parser.js:287:98)An additional note is that inside config/database.js, the following setting has been added:
ssl: {rejectUnauthorized: false},This ensures the rejectUnauthorized flag is used when deployed on the App platform. When running locally, we switch it back to:
ssl: env.bool('DATABASE_SSL', false),Learn more about the config files in this video.
This method must be used in the real production app!
Connect your Database
In addition to the above, you also need to make sure you have a database connected to your project. The default in DO App Platform is Postgresql, which is what we have used when creating the app.
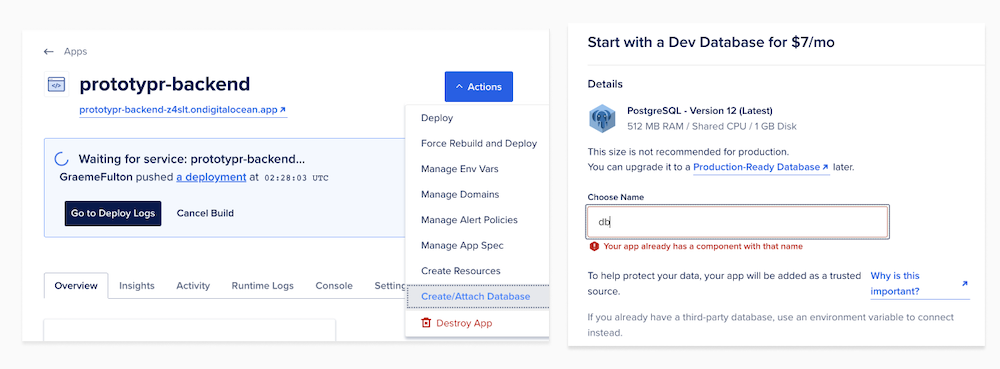
You can add a database at any point, but make sure the name corresponds to that used in your Environmental variables (see above re: db.HOSTNAME).
Securing the database user
The default user from this setup is called 'db'. In digital ocean app platform, you can add a new db user from the database management section:
.png)
After you add the user, you must grant them priveleges on your database.
The Digital Ocean web interface doesn't have that option, instead you need to connect via a terminal using psql. There is a guide here.
You'll notice the permissions in DigitalOcean's guide don't work. Instead, when adding permissions, use the commands in this answer.
If you've changed your database username, you'll also need to update it in your app settings: Screenshot of app settings section in digital ocean
Done
With that, you should be up and running. For more information, check out this blog post, which has useful videos for deploying the backend.
Working with Digital Ocean databases
For Prototypr, we have set up a development app, and a production app on the App platform. That's 2 separate apps, but the developement one is using sandbox resources so is around half the price.
We needed to move data from production to development, here are some ways:
Plugin
This plugin is the easiest way for moving post collections: Import export plugin! In the future, I'll provide some way to seed the database with some sample Prototypr data.
Postgres commands:
Here's how you might export the entire db:
pg_dump -h <your_host> -U <your_username> -p 25060 -Fc <your_database> > <path/to/your_dump_file.pgsql>
pg_restore -d <your_connection_URI> --jobs 4 <path/to/your_dump_file.pgsql>
Authentication
For users to log in, we set up the social login providers in Strapi, and log in from the Next.js front-end.
Set up Strapi Auth Providers
For authentication to work, the providers section must be set up in Strapi. We're using GitHub and Twitter to start with:

Social Credentials
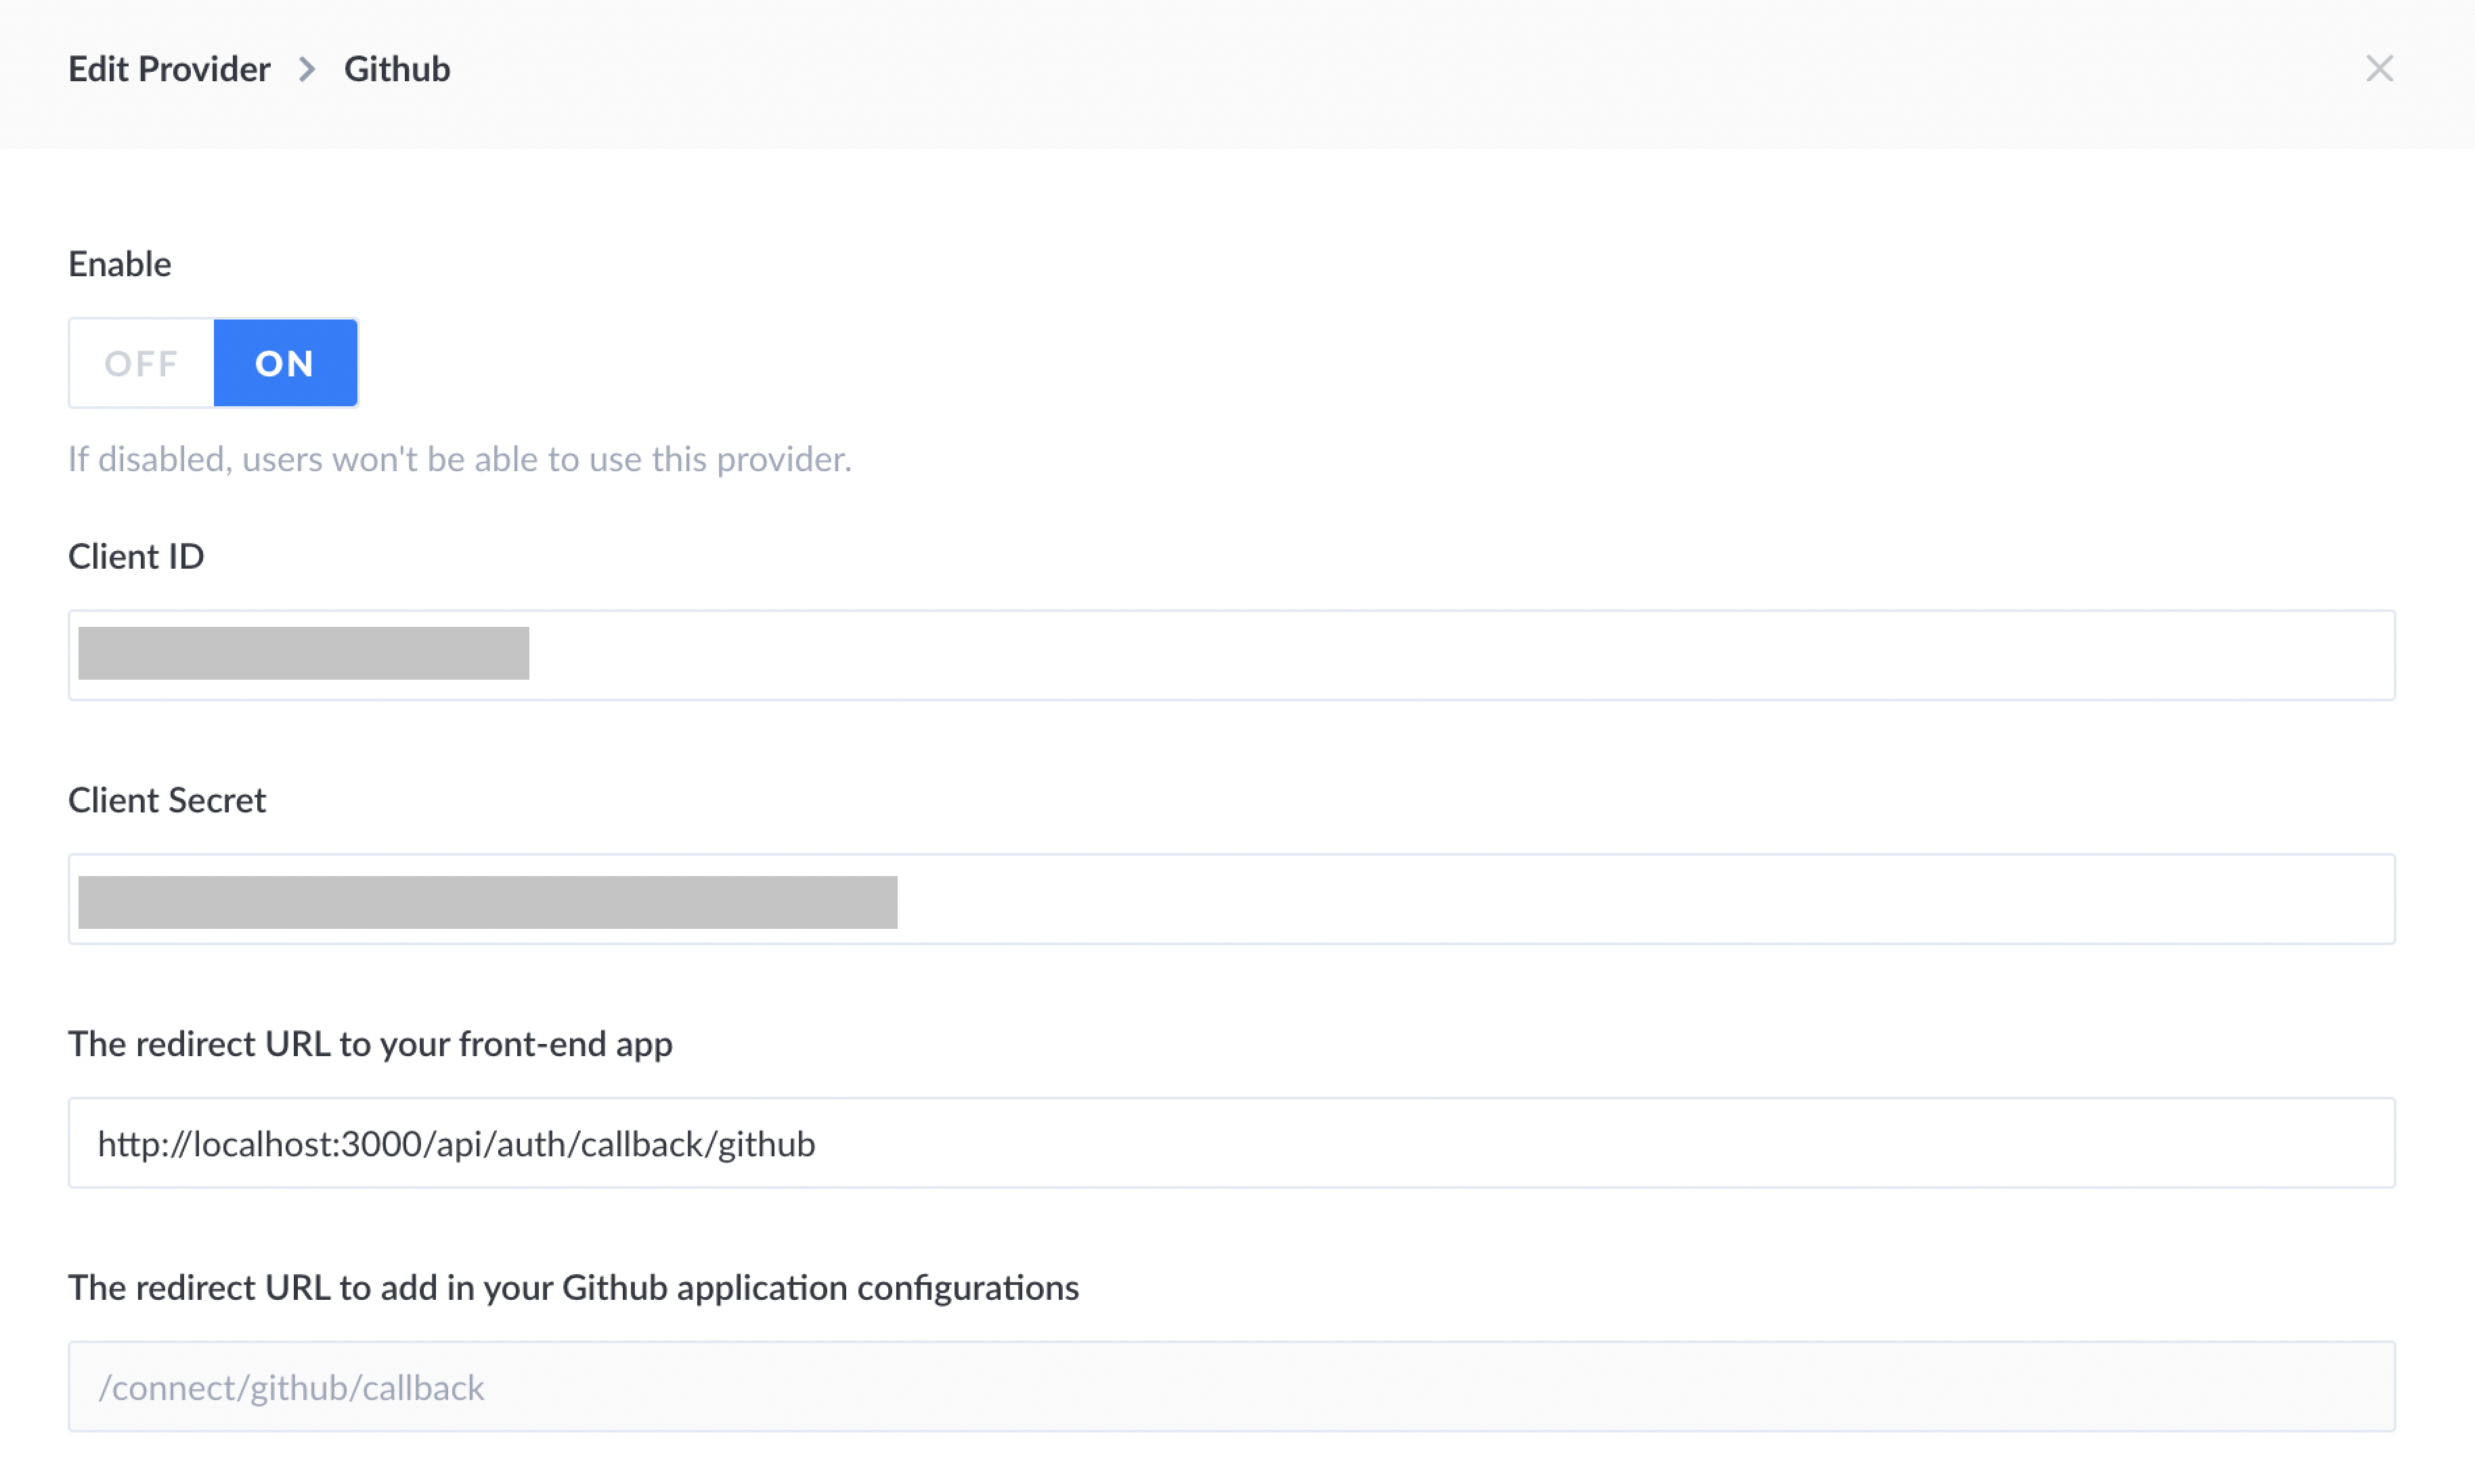
Below is a screenshot of the GitHub fields:
- Client ID and Client Secret will be the same ID and Secret used in the Next.JS front-end
.envfile! - Make sure the redirect URL is correctly set to the Next frontend too, like this:
http://localhost:3000/api/auth/callback/githubHere's a screenshot of the filled out GitHub fields. It's very similar for Twitter, but overall, it's very important to get the callback URL correct first time to save some hours debugging 😅!
Callback URLs in Social Apps❗️
Another important part is the Callback URL used when creating social apps in Twitter or GitHub. The Callback URL is the NextAuth route from the Next.js application, not anything from the Strapi dashboard! For example, for Twitter, it is:
https://prototypr-frontend-1s0hl5bwy-prototypr.vercel.app/api/auth/callback/twitteror for localhost:
http://localhost:3000/api/auth/callback/twitterThis is often the cause of the issue when you see the error: Try signing with a different account. in a blue box.